How Do I SSH Into Pi Over The Internet? The Ultimate Guide For Tech Enthusiasts
So, you're here because you want to know how to SSH into your Raspberry Pi over the internet, right? Let's be honest, this isn't just some random tech question—it’s like unlocking a superpower for your little Pi. Imagine being able to control your Raspberry Pi from anywhere in the world, whether you're chilling at a coffee shop or on vacation in Bali. Sounds cool, doesn’t it? But hold up, before we dive deep into the how-to, let’s break it down a bit. SSH (Secure Shell) is like a secret handshake between your computer and your Pi, but doing it over the internet adds a whole new layer of complexity—and fun. Stick around, and we'll make sure you’ve got everything you need to get started.
Now, why would anyone want to SSH into their Pi over the internet? Well, think about it. You’ve set up your Pi as a home server, media center, or maybe even a personal cloud. But what happens when you’re not at home and need to access your files or manage your setup? That’s where remote SSH comes in. It’s like having a remote control for your Pi, no matter where you are. So, if you’re ready to level up your Pi game, let’s get into the nitty-gritty details.
Before we jump into the steps, I want to give a quick shoutout to all the Pi enthusiasts out there who are always looking for ways to make their projects smarter and more accessible. This guide isn’t just about SSH; it’s about empowering you to take full control of your tech. Whether you’re a beginner or a seasoned pro, by the end of this, you’ll have the skills to SSH into your Pi like a boss. Let’s go!
Table of Contents:
- What is SSH and Why Does It Matter?
- Raspberry Pi Setup for Remote Access
- Enabling SSH on Your Raspberry Pi
- Network Configuration for SSH
- Understanding Port Forwarding
- Using DDNS Services for Dynamic IPs
- Security Best Practices for Remote SSH
- Testing Your SSH Connection
- Troubleshooting Common Issues
- Final Thoughts and Next Steps
What is SSH and Why Does It Matter?
Alright, let’s start with the basics. SSH, or Secure Shell, is like a secure tunnel that lets you remotely control another computer—in this case, your Raspberry Pi. It’s not just about typing commands; it’s about managing files, running scripts, and even accessing graphical interfaces if you’ve got the right setup. SSH is the backbone of remote access, and it’s super secure, which is why it’s trusted by developers, sysadmins, and tech enthusiasts worldwide.
Here’s the deal: when you SSH into your Pi over the internet, you’re essentially giving yourself remote access to its terminal. You can install software, edit files, restart services, and do pretty much anything you’d do if you were sitting right in front of it. But—and this is a big but—it’s not as simple as plugging in a cable. You’ve got to configure your network, set up security measures, and make sure everything is working smoothly. Don’t worry, though; we’ll walk you through it step by step.
Why Should You Care About SSH?
If you’re into home automation, media servers, or just want to tinker with your Pi from anywhere, SSH is your best friend. Here are a few reasons why it matters:
- Remote Access: Control your Pi from anywhere in the world.
- Security: SSH uses encryption to protect your data during transmission.
- Flexibility: You can run commands, transfer files, and manage services remotely.
- Automation: Set up scripts to automate tasks on your Pi, even when you’re not around.
Raspberry Pi Setup for Remote Access
Alright, let’s talk about getting your Pi ready for the big leagues. Before you can SSH into your Raspberry Pi over the internet, you need to make sure it’s set up properly. This means installing the right software, configuring your network settings, and making sure everything is secure. Don’t skip this step—it’s the foundation of your remote access setup.
First things first, you’ll need a Raspberry Pi with Raspbian (or any other Linux-based OS) installed. Make sure your Pi is connected to your home network and has a static IP address. Why a static IP? Because if your Pi’s IP keeps changing, it’ll be like trying to call a phone number that keeps switching. Not fun.
Steps to Set Up Your Pi:
Here’s a quick rundown of what you need to do:
- Install Raspbian or your preferred OS on your Pi.
- Connect your Pi to your home network via Wi-Fi or Ethernet.
- Set a static IP address for your Pi in your router’s settings.
- Update your Pi’s software using
sudo apt updateandsudo apt upgrade.
Once you’ve got your Pi set up, you’re ready to move on to the next step: enabling SSH.
Enabling SSH on Your Raspberry Pi
Now that your Pi is all set up, it’s time to enable SSH. This is the part where you give your Pi permission to accept remote connections. It’s super easy, and it only takes a few minutes. Trust me, you’ll thank yourself later when you’re able to SSH into your Pi from anywhere.
There are a couple of ways to enable SSH on your Pi. The easiest way is to use the Raspberry Pi Configuration tool. Just open up a terminal on your Pi and type sudo raspi-config. From there, navigate to the SSH option and enable it. Boom, done.
Alternative Methods:
If you’re not running a desktop environment on your Pi, you can enable SSH by creating a file called ssh in the boot partition. Here’s how:
- Insert your Pi’s SD card into your computer.
- Create an empty file named
ssh(no file extension) in the boot partition. - Eject the SD card and insert it back into your Pi.
That’s it! Your Pi will now have SSH enabled by default.
Network Configuration for SSH
Now that SSH is enabled, it’s time to configure your network settings. This is where things can get a little tricky, but don’t worry—we’ve got you covered. The goal here is to make sure your Pi is accessible from the internet while keeping everything secure.
The first step is to find your Pi’s local IP address. You can do this by running hostname -I in the terminal. Once you’ve got your Pi’s IP, you’ll need to configure your router to forward traffic to it. This is where port forwarding comes in.
Setting Up Port Forwarding:
Port forwarding is like telling your router, “Hey, when someone tries to connect to this port, send them to my Pi.” Here’s how you do it:
- Log in to your router’s admin interface (usually
192.168.0.1or192.168.1.1). - Find the port forwarding section and add a new rule.
- Set the external port to 22 (the default SSH port) and the internal IP to your Pi’s IP.
- Save the changes and restart your router.
With port forwarding set up, you’re one step closer to SSH-ing into your Pi over the internet.
Understanding Port Forwarding
Port forwarding is a crucial part of remote SSH, so let’s take a moment to understand how it works. Think of your router as a gatekeeper. When someone tries to connect to your network from the internet, your router needs to know which device to send that traffic to. That’s where port forwarding comes in.
By setting up a port forwarding rule, you’re telling your router to forward traffic on a specific port (in this case, port 22 for SSH) to your Pi. This allows you to connect to your Pi from anywhere in the world, as long as you know your public IP address.
Why Is Port Forwarding Important?
Port forwarding is important because it ensures that your SSH connections are directed to the right device. Without it, your router wouldn’t know which device to send the traffic to, and you’d be stuck with a “connection refused” error. It’s like giving your Pi a direct line to the outside world.
Using DDNS Services for Dynamic IPs
Here’s a common problem: most home internet connections have dynamic IP addresses, which means your public IP can change without warning. If you’re trying to SSH into your Pi over the internet, this can be a major headache. That’s where DDNS (Dynamic DNS) services come in.
A DDNS service gives you a hostname that always points to your current public IP, even if it changes. This means you can connect to your Pi using a hostname instead of an IP address, which is way easier to remember.
How to Set Up DDNS:
Here’s how you can set up DDNS for your Pi:
- Sign up for a free DDNS service like No-IP or DuckDNS.
- Create a hostname and configure it to point to your public IP.
- Install the DDNS client on your Pi to keep your hostname updated.
With DDNS set up, you’ll always be able to connect to your Pi, no matter what your public IP is.
Security Best Practices for Remote SSH
Now, let’s talk about security. SSH is secure by default, but that doesn’t mean you can just leave it wide open. There are a few best practices you should follow to make sure your Pi is as secure as possible.
First, change the default SSH port from 22 to something less common. This makes it harder for attackers to find your SSH service. Second, use strong passwords or, better yet, set up SSH keys for authentication. Finally, consider using a tool like Fail2Ban to block repeated login attempts.
Advanced Security Tips:
Here are a few advanced tips to boost your SSH security:
- Disable password authentication and use SSH keys instead.
- Limit SSH access to specific IP addresses using your router’s firewall.
- Regularly update your Pi’s software to patch security vulnerabilities.
By following these best practices, you’ll keep your Pi safe and secure, even when it’s exposed to the internet.
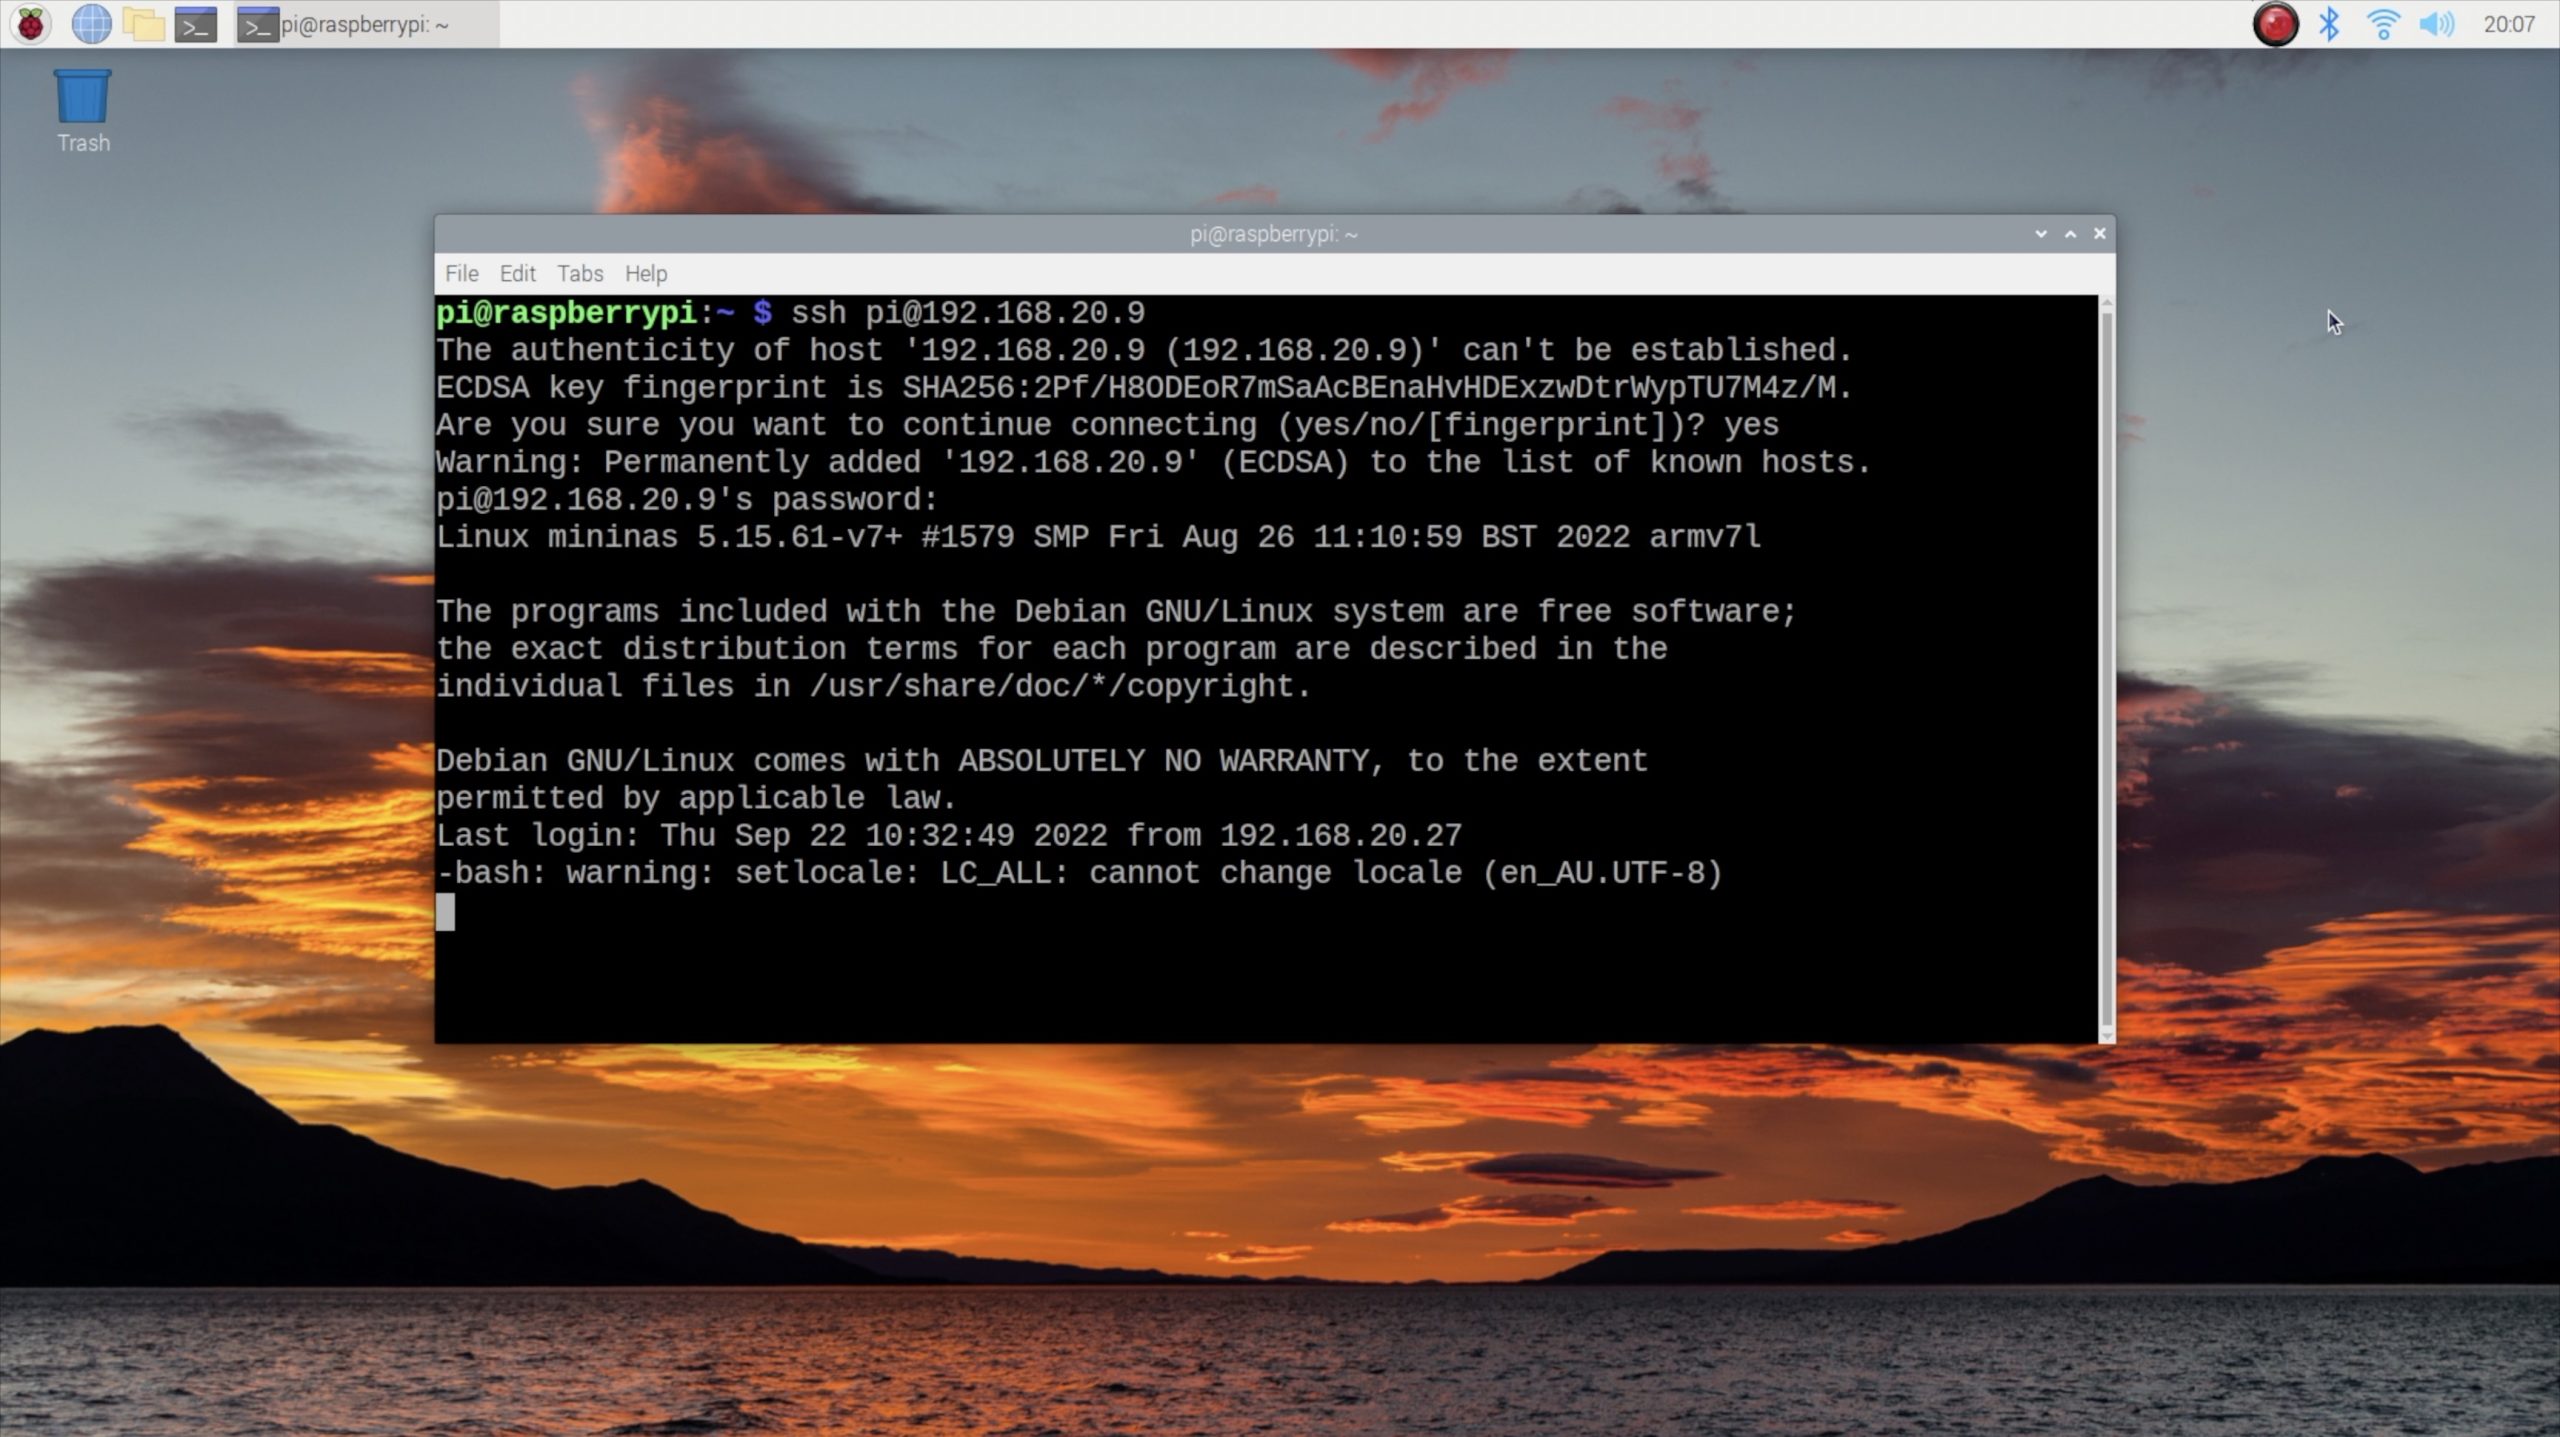
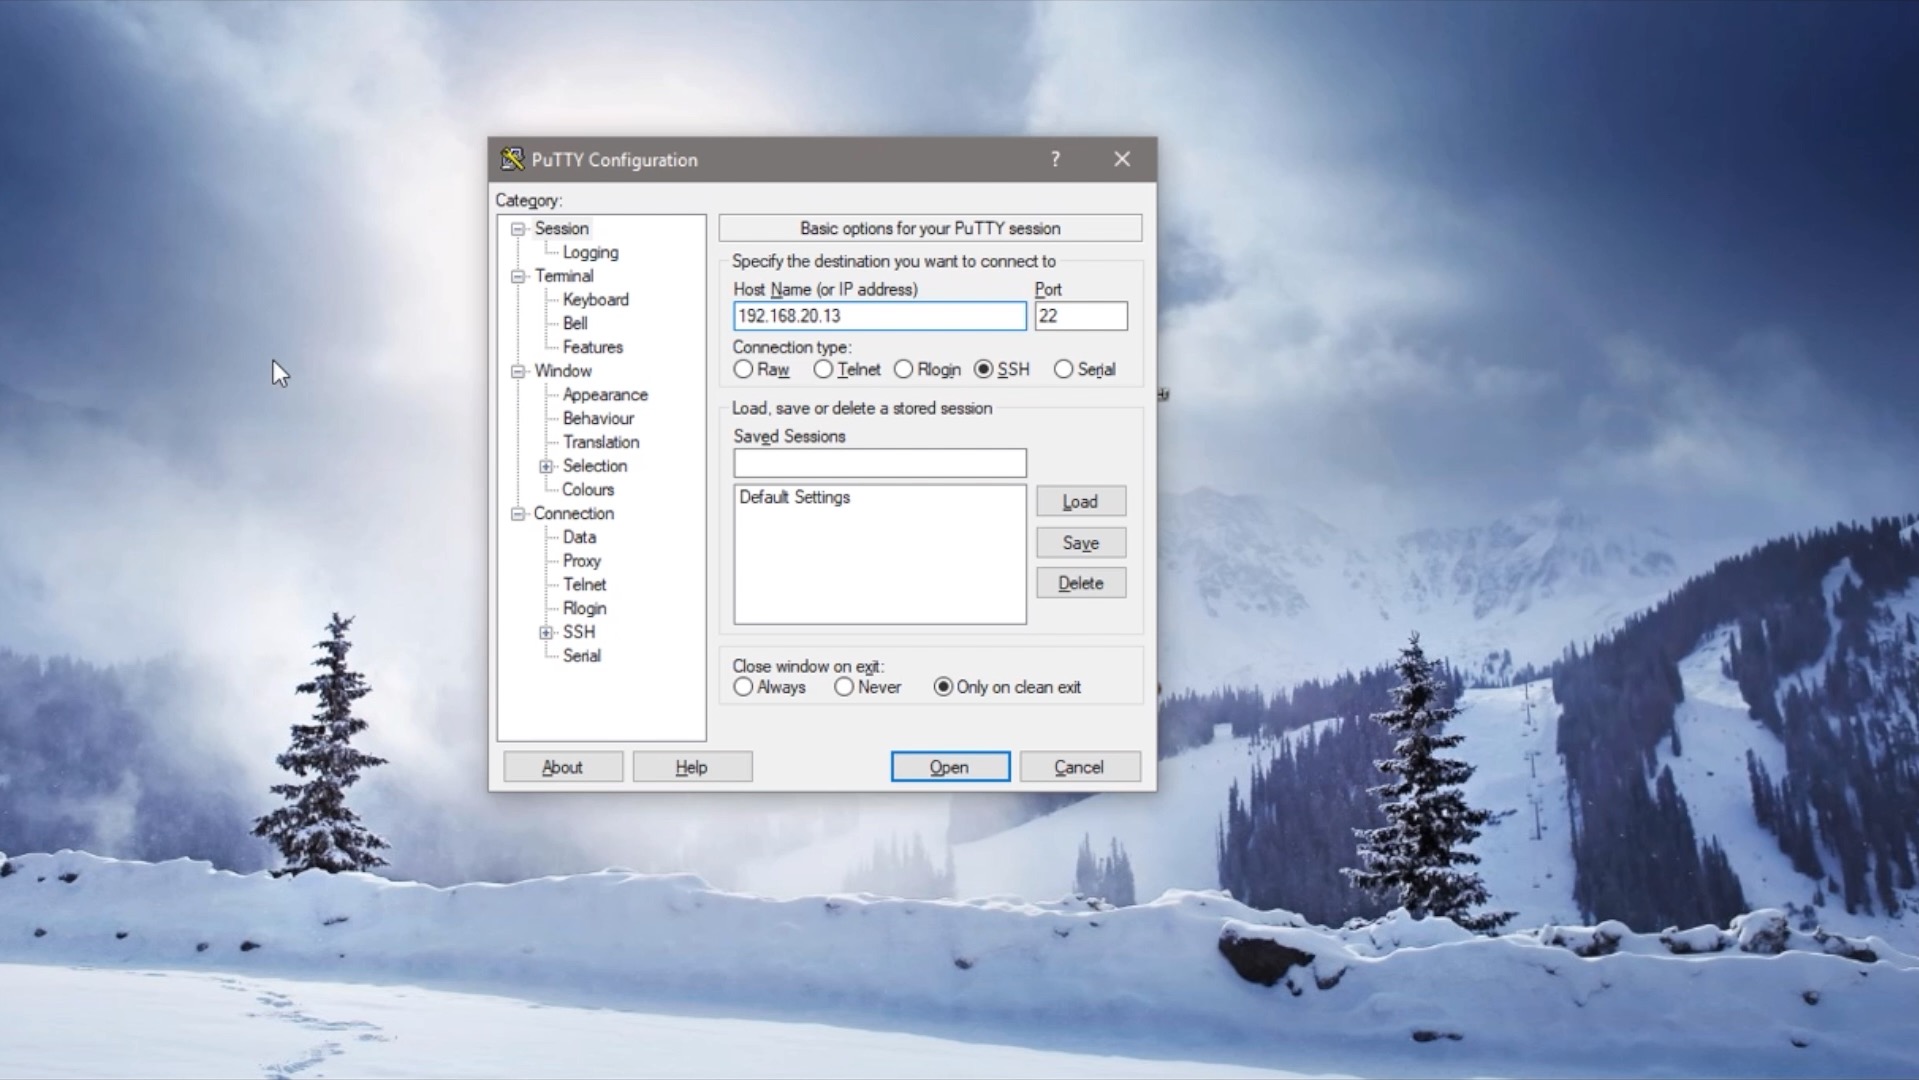
Testing Your SSH Connection
Alright, you’ve done all the setup. Now it’s time to test your SSH connection. Open up a terminal on your computer and type ssh pi@your.ddns.hostname. If everything is set up correctly, you should be prompted for your Pi’s password or SSH key. Once you’re in, congrats! You’ve successfully SSH-ed into your Pi over the internet.
Try running a few commands to make sure everything is working as expected. You can check your Pi’s status, manage services, or even update your software. It’s like having a remote terminal right at your fingertips.
Troubleshooting Common Issues
Let’s face it: things don’t always go as planned. If you’re having trouble SSH-ing into your Pi, here are a few common issues and how to fix them:
- Connection Refused: Double-check your port forwarding settings and make sure your router is forwarding traffic to your Pi.
- Host Key Verification Failed: This usually happens if your Pi’s IP has changed. Try deleting the old key from your
~/.ssh/known_hostsfile.

Detail Author:
- Name : Talon Bayer
- Email : jay.williamson@harber.com
- Birthdate : 1984-06-21
- Address : 88467 Fannie Turnpike West Adriennebury, CT 78939-1832
- Phone : 224-805-3366
- Company : Blick Group
- Job : Kindergarten Teacher
- Bio : Nihil placeat temporibus quae quas quo ex in facilis. Nostrum labore modi perspiciatis magni est. Inventore est quidem et quia consectetur rerum numquam.

